
Having presented some of the many fossils we have collected we thought we might construct a page devoted to the preparation of fossils. In fact the heading for this page could be called the ‘before and after’ page because that’s exactly what we intend to show you – fossils before preparatory work is conducted on them – and the same fossils after they have been prepared.
Preparation does not necessarily mean cleaning and removing a fossil entirely from the matrix surrounding it. As you will see from the following example, many fossils are enhanced by leaving a matrix surround. Furthermore the presence of the sediment in which the fossil formed invariably adds to the scientific value of the fossil.
The example shown (an ammonite known as Promicroceras) was prepared using a vibro-pen (engraver), sharp points (fashioned dental tools and darts) and a Dremel power tool. The stone was found on the beach at Lyme Regis in Dorset. A hammer blow to the side of the stone (see figure 1) revealed the edge of the fossil. No further preparation was conducted until it was brought back to the workshop. Once in the workshop, the matrix surrounding the fossil was carefully removed using the vibro-pen. The more delicate work, removing stone adhering to the ammonite’s inner whorls, was conducted using the sharp points mentioned earlier. Finally a Dremel power tool smoothed the matrix surrounding the fossil to tidy the piece (see figure 2). The total preparation time, start to finish, was 30 minutes during which protective glasses and a face mask were used for safety purposes.
 Notice the light area on the edge of stone to the left of the ammonite. This marks where the stone was first struck to reveal the ammonite. |
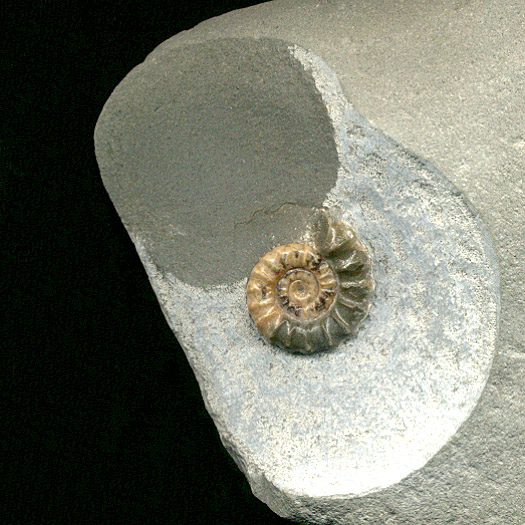 The ammonite is now fully revealed. It is preserved in calcite and measures just over 2 cm across. |